This post is going to be about how you can kill people with your sharp, fierce winged eyeliner!!!
.........Just kidding!
But, I shall be showing you guys exactly how I do my winged eyeliner :)
I absolutely LOVE applying liquid eyeliner and I am all about doing a crazy and really exaggerated wing! It's definitely my favourite part when I'm applying my make up. So I want to show you step by step exactly how I manage to do this.
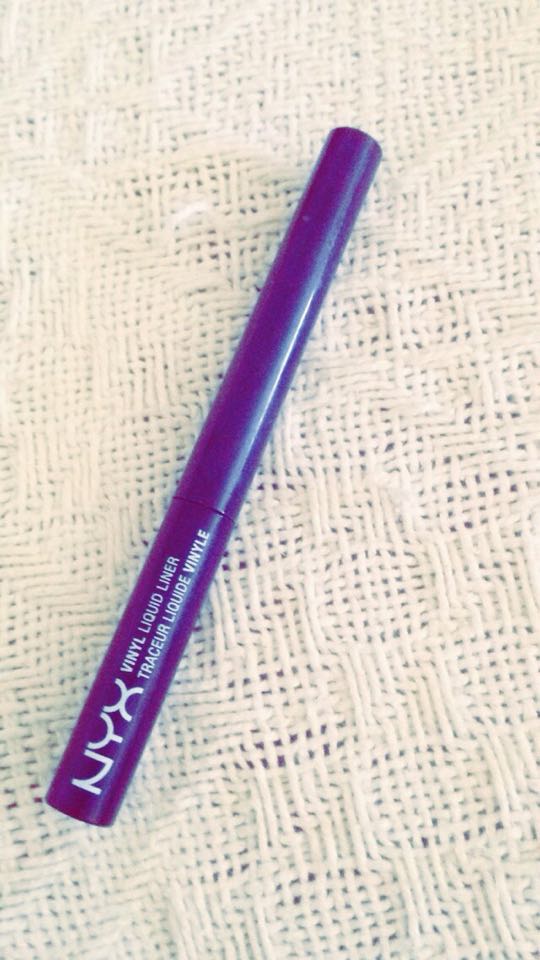
First of all, I use a liquid eyeliner. I personally prefer liquid eyeliners instead of gel/cream or pencils. I find them great and I just got really used to using them. However, it is not the easiest thing to use, you definitely need a steady hand and to be really careful when applying it. Also, practice makes perfect, so don't give up if it's not great the first time, eventually you will manage! I definitely recommend a liquid eyeliner if you want a fierce and well defined wing. I will be showing you a simple and easy way how to apply eyeliner and some different eyeliner styles too. I use the NYX liquid eyeliner for all of this - I've been so happy with this eyeliner, it's absolutely super! It's very dark black and it's the perfect size.

Firstly, apply a thin line on your upper lash line. If you do not have a steady hand, I suggest you rest your elbow on a table and do this slowly and carefully. Start from the centre and continue till the end of your eye and till the tear duct. If you're still finding it difficult to create this line, apply lots of dots on the upper lash line and then just join them.

After you finish applying the line, create your tail! Position the eyeliner brush on the outer edge of your eyelid and create a line upwards. Use the tip of your eyebrow as a guide for the tail! If you find this difficult, grab a piece of tape and stick it from the end of your eyebrow to the edge of the eyelid. This will be your guide for that perfect wing! Once that's done, create a triangle. So from your eyelid till the tip of the point as shown in the photos below.


The final step is to fill in the space and that's it! You have a fierce wing! If you feel you went over the triangle mark, you can always grab a concealer brush to fix the little mistakes. Also, if you feel your winged eyeliner is not sharp enough, concealer helps to create a sharp and defined wing. Apply the concealer right underneath the wing and on top, of course blend that out.

Now I'm going to show you some different styles of winged eyeliners. The picture above is a simple winged eyeliner look. If you want a more dramatic look, I suggest you do the exact same steps, however this time you make the line much thicker, to create a thick and fierce wing. Like the photo below. I went over my eyeliner to create a thicker line and a thicker wing.

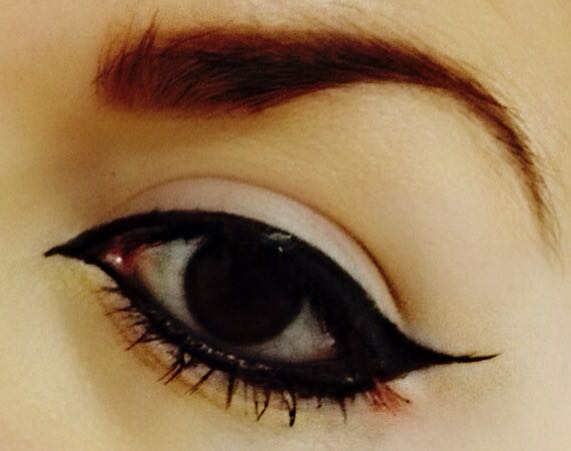
You can also add another wing to that! Double winged eyeliner. All you have to do is apply the eyeliner underneath the water line and carry it up underneath the first wing. This look is an awesome fun party look and it's something different.

If you still want something more dramatic and more cat eye looking, then you can have something like the picture below. You carry on applying the eyeliner underneath the water line till the tear duct and create a little point. Then join the point with the eyeliner on the upper lash line. In the photo below, I kept my double wing, however you can remove the second wing.

If these looks are a bit too much, then I suggest a small winged eyeliner look. Do not apply the eyeliner way too thick, create a thin line. This look is very elegant and simple. For this you would just have to create a very small triangle and do not put a lot of product on the brush. As you can see in the photo below, the line is very sharp and thin.
So those are my winged eyeliner looks! Really hope that you liked them and that this post was helpful in some way. If you have any questions or difficulties regarding how to apply eyeliner, then leave a comment below and I shall reply right away. Feel free to leave any comments!
Lots of love - Suzanne P.D.
No comments:
Post a Comment